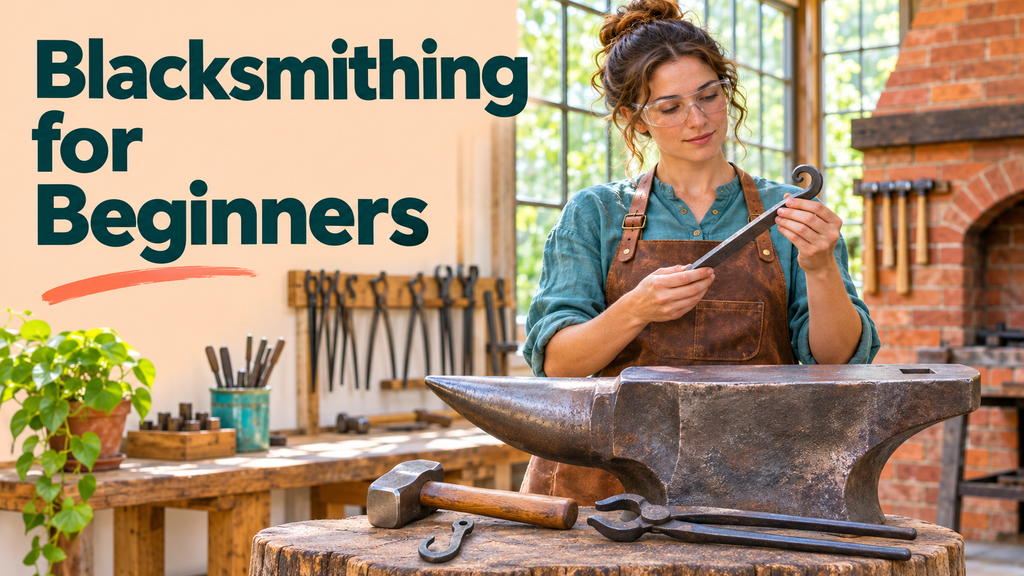
Blacksmithing is the craft of shaping hot metal with a hammer, and it is enjoying a strong revival among hobbyists and makers. With a basic forge, an anvil and a few hand tools, beginners can make useful and beautiful objects within their first few sessions.
Unlike many modern crafts, blacksmithing rewards patience and practice more than expensive equipment. You do not need a large workshop to start, but you do need to understand how heat changes steel, how to set up a safe working area and which tools are worth buying first. This guide covers forge options, essential tools, choosing steel, core forging techniques, first projects, heat treating basics, safety and ways to keep learning.
Table of Contents
How Blacksmithing Works
Steel becomes soft and workable when heated to a bright orange or yellow colour. At these temperatures it can be stretched, bent, flattened and split with hammer blows. As it cools, it stiffens again, so blacksmiths work in short bursts called heats, returning the metal to the fire whenever it starts to lose colour.
Reading heat by colour is one of the first skills to learn. Bright yellow-orange is the main working range for most forging. Dull red is too cold for heavy hammering and can cause cracks, while sparkling white means the steel is starting to burn, which ruins it.
Choosing a Forge
The forge is your heat source. Beginners usually choose between three types.
Propane Forges
Gas forges are the most popular choice for new smiths. They light quickly, run cleanly, need little management and are easy to set up in a garage or backyard. Small one- or two-burner forges suit knives, hooks and small decorative work. Their main limits are the size of the opening and the ongoing cost of propane.
Coal and Charcoal Forges
Solid fuel forges are the traditional option. They allow you to heat just one section of a bar, which is useful for scrolls and localised bends, and they reach welding temperatures easily. They take longer to learn, produce more smoke and need a good supply of blacksmithing coal or hardwood charcoal.
Induction Forges
Induction heaters use electromagnetic fields to heat steel directly. They are fast, quiet and flame-free but cost more and work best with certain bar sizes. They are increasingly popular for small urban workshops.
Essential Tools for Beginners
| Tool | Budget Option | What to Look For |
|---|---|---|
| Anvil | Heavy steel block or rail section | Good rebound, flat face |
| Hammer | 2 to 3 lb cross-peen | Smooth, slightly rounded face |
| Tongs | Flat-jaw and wolf-jaw pairs | Firm grip on your stock size |
| Vice | Heavy bench vice | Post vice if you can find one |
| Quench tank | Metal bucket of water | Kept within arm’s reach |
The Anvil
A good anvil has a hardened, flat face that bounces the hammer back, which saves energy and makes blows more effective. Test rebound by dropping a ball bearing on the face; a good anvil returns it most of the way. A horn helps with bending curves, and the square hardy hole holds cutting and shaping tools. Beginners can start with an anvil around 100 to 150 pounds, mounted on a sturdy stump so the face sits around knuckle height when your arms hang down.
Hammers and Tongs
A cross-peen hammer of about two to three pounds is the most versatile starter hammer. The flat face moves metal in all directions, and the narrow peen spreads it in one direction. Tongs must fit the stock you are holding; poorly fitting tongs let hot metal slip. Many smiths learn by forging their own tongs as an early project.
Other Useful Tools
- Hot cut hardy and chisels for cutting hot steel.
- Punches and drifts for making holes.
- A wire brush to remove scale.
- Soapstone for marking measurements on steel.
- A file and angle grinder for finishing.
Choosing Steel
Beginners should start with mild steel, such as common hot-rolled bar from a local steel supplier. It is inexpensive, forgiving and forms easily, making it ideal for hooks, tools and decorative items. Round and square bar in sizes from about 1/4 to 1/2 inch is easiest to work by hand.
For knives, chisels and tools that need to hold an edge, you will need high-carbon steel such as 1084, 1095 or 5160 spring steel. These can be hardened through heat treatment. Scrap such as old files, leaf springs and coil springs is high carbon but of unknown composition, so results can vary.
Never forge galvanised or zinc-coated steel. Heating it releases zinc oxide fumes that can cause metal fume fever, a flu-like illness, and repeated exposure is harmful.
Core Forging Techniques
- Drawing out: lengthening and thinning a bar by hammering it, often to form a point or taper.
- Upsetting: making a section thicker and shorter by striking the end of a hot bar.
- Bending: curving or angling steel over the horn, the anvil edge or in a vice.
- Twisting: rotating a heated square bar with a wrench to create decorative spirals.
- Punching and drifting: forcing a hole through hot steel and enlarging it to size.
- Scrolling: forming decorative curls at the ends of bars.
- Cutting: splitting hot steel with a hot cut or chisel.
Good hammer technique matters more than strength. Hold the hammer loosely near the end of the handle, let the hammer’s weight do the work and strike with the face flat to avoid leaving deep marks. Rotate the bar a quarter turn between blows to keep it square.
Best First Projects
Simple projects teach the basic techniques and produce useful items:
- S-hooks: teach tapering, scrolling and bending, and are useful around the home and garden.
- Tent stakes: practise points and simple bends.
- Fire pokers: combine drawing out, twisting and forming a handle.
- Bottle openers: introduce punching and shaping.
- Leaf key rings: build control over spreading and texturing metal.
- Simple tongs: a satisfying project that makes your own tools.
Heat Treating Basics
High-carbon steel can be made hard enough to hold an edge, then toughened so it does not break. The process usually has three stages:
- Normalising: heating the steel to a non-magnetic state and letting it cool in still air, repeated a few times to relieve stress and refine the grain.
- Hardening: heating to the right temperature, often checked with a magnet, then quenching in oil or water depending on the steel.
- Tempering: reheating the hardened steel to a lower temperature, often in a kitchen oven, to reduce brittleness.
Each steel has its own ideal temperatures and quench medium. Follow the supplier’s data sheet, and use a fire-safe metal container with a lid for oil quenching, kept away from the forge.
Setting Up a Safe Workspace
Blacksmithing involves fire, hot metal and heavy blows, so safety must be built into your setup.
- Work outdoors or in a well-ventilated space, as forges produce carbon monoxide.
- Install a carbon monoxide detector if you forge in a garage or shed.
- Keep a fire extinguisher and water bucket within reach.
- Remove flammable items, including fuel cans, sawdust and rags, from the area.
- Store propane cylinders outside and check hoses and fittings for leaks.
- Keep children and pets well away while working.
Personal Protective Equipment
Wear safety glasses at all times, as scale and sparks fly from every blow. Hearing protection is important because ringing anvils are very loud. Choose natural fibre clothing such as cotton or wool, since synthetics can melt onto skin, and wear a leather apron and sturdy leather boots. Many smiths avoid gloves on the hammer hand for better grip, but a glove on the tong hand helps with radiant heat. Treat every piece of steel as hot, because metal that has stopped glowing can still cause serious burns.
Budget and Getting Started
A basic beginner setup with a small propane forge, a used or entry-level anvil, a hammer, a few pairs of tongs and safety gear can cost a few hundred to over a thousand dollars, depending on whether you buy new or used. Anvils are usually the largest expense. Checking estate sales, farm auctions and local blacksmithing groups can help find quality used tools at fair prices.
Where to Learn More
Hands-on instruction speeds up progress and helps avoid bad habits. Look for weekend classes at craft schools, community colleges, folk schools and makerspaces. Local blacksmithing guilds affiliated with the Artist Blacksmith’s Association of North America hold open forge days where beginners can try equipment before buying. Books and online video courses are excellent supplements, but nothing replaces time at the anvil.
As your skills grow, you may want to sell your work through craft fairs, farmers markets or online marketplaces. If you start selling, consider a simple business registration, liability insurance for events and checking that your homeowners insurance covers a home workshop.
Final Thoughts
Blacksmithing for beginners starts with a reliable forge, a solid anvil, a good hammer and well-fitting tongs, along with mild steel and a safe, ventilated workspace. Practise heat colours, hammer control and basic techniques through simple projects like hooks and pokers, then move on to tools and heat-treated steel as your confidence grows.
FAQs
1. What is the best forge for a beginner blacksmith?
A small propane forge is usually best. It is easy to light, clean to run and simple to manage.
2. What steel should beginners use?
Start with mild steel bar. It is cheap and forgiving. Move to high-carbon steel when making knives or tools.
3. Can I blacksmith in my garage?
Yes, with good ventilation, a carbon monoxide detector, fire safety equipment and flammable materials removed.